blog
Master the Basics of Crochet in Just a Week
Crochet is a versatile and rewarding craft that allows you to create beautiful, handmade items like scarves, blankets, and even toys. If you’ve always wanted to learn how to crochet but felt overwhelmed by the complexity, don’t worry! With a little dedication and a structured approach, you can master the basics of crochet in just a week. This article will guide you through the essential crochet techniques and provide a step-by-step plan to help you become a confident crocheter in no time.
What You Need to Get Started
Before diving into your crochet journey, you’ll need a few essential tools and supplies. Here’s what you’ll need to get started:
1. Yarn
Yarn is the foundation of every crochet project. For beginners, it’s recommended to use medium-weight yarn (usually labeled as “worsted weight”) because it’s easy to handle. Choose a light-colored yarn, as it will be easier to see the stitches while you’re learning.
2. Crochet Hook
Crochet hooks come in a variety of sizes, but for beginners, a hook size between 5mm (H-8) and 6mm (J-10) is a good starting point. The size of the hook you choose will correspond to the thickness of the yarn. Most yarn labels provide a recommended hook size.
3. Scissors
You’ll need a pair of sharp scissors to cut the yarn when you finish a project.
4. Tapestry Needle
A tapestry needle is a blunt-ended needle used to weave in the ends of the yarn after you finish crocheting. It’s essential for a clean and professional finish.
5. Stitch Markers (Optional)
While not essential, stitch markers can help keep track of your work, especially in the beginning when you might lose your place.
Once you have your materials, you’re ready to begin learning the basics of crochet!

Day 1: Getting Comfortable with the Basics
Understanding the Yarn and Hook
The first thing you need to get comfortable with is holding the crochet hook and yarn. There are different methods for holding your crochet hook, and finding the one that feels most natural for you is important. You can hold the hook like a pencil or like a knife—experiment with both to see which one suits your style.
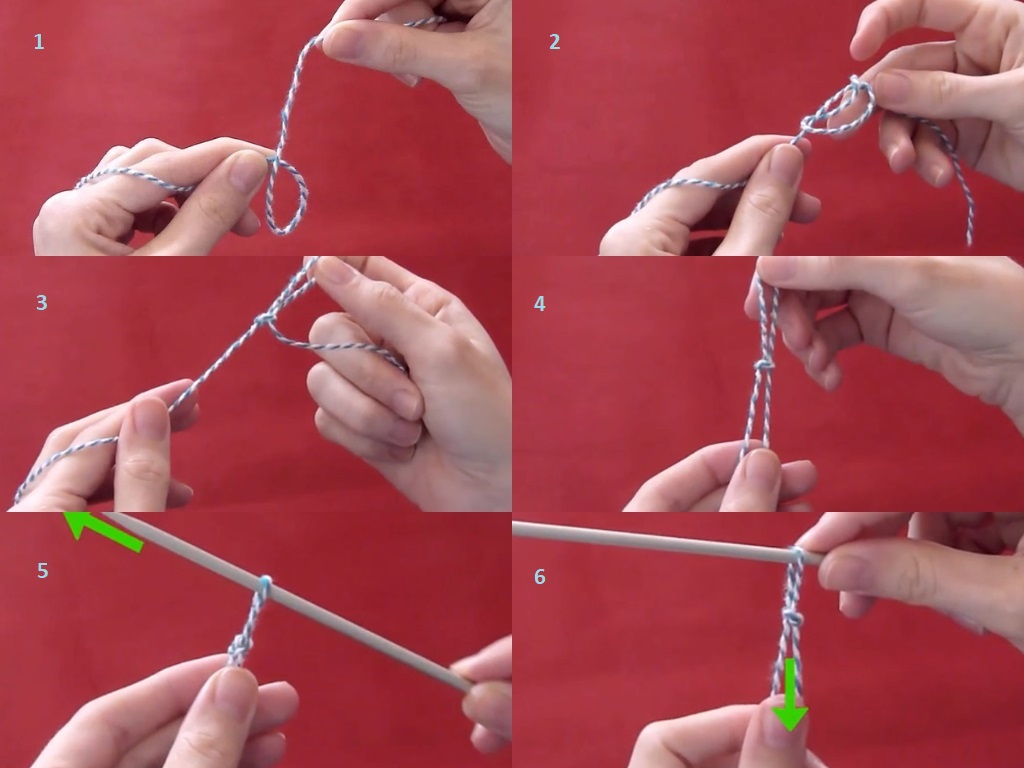
Next, learn how to make a slip knot. This knot will be the first thing you do every time you start a crochet project. To make a slip knot:
- Create a loop with your yarn.
- Pass the yarn through the loop, forming another loop.
- Tighten the loop onto your crochet hook.
Once you’ve mastered the slip knot, you can practice making your first crochet stitch—the chain stitch. The chain stitch is the foundation of nearly every crochet project, and mastering it is key to success.
Practicing the Chain Stitch
To make a chain stitch:
- Yarn over (wrap the yarn over the hook from back to front).
- Pull the yarn through the loop on your hook.
Repeat this process to create a chain of stitches. Practice until you feel comfortable with the motion.
Day 2: Learning the Single Crochet Stitch
The next step is learning the single crochet stitch (sc), one of the most basic and commonly used stitches in crochet. Here’s how to do it:
- Insert your hook into the next chain stitch.
- Yarn over and pull the yarn through. You should now have two loops on your hook.
- Yarn over again and pull the yarn through both loops on the hook.
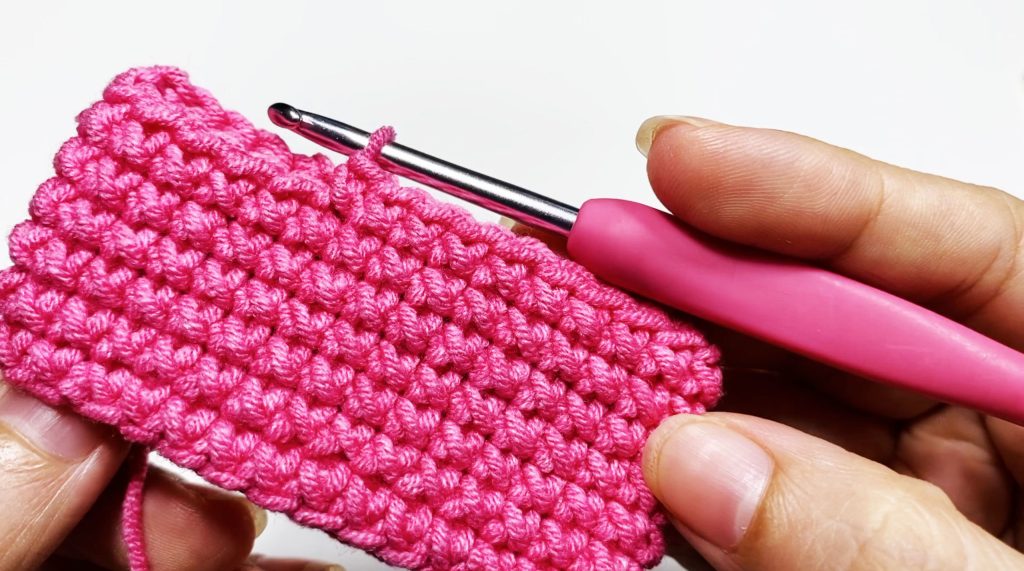
This is the single crochet stitch. Practice making several rows of single crochet to get a feel for the stitch.
Key Tips for Single Crochet:
- Make sure your tension is consistent. If your stitches are too tight, your project will be hard to work on. If they’re too loose, your project might look uneven.
- Count your stitches regularly to avoid mistakes.
Day 3: Mastering the Half Double Crochet Stitch
After you’ve gotten comfortable with the single crochet, the next stitch to learn is the half double crochet stitch (hdc). This stitch is slightly taller than the single crochet but shorter than the double crochet. It’s a versatile stitch that’s used in many crochet projects.
To make a half double crochet stitch:
- Yarn over.
- Insert the hook into the next stitch.
- Yarn over again and pull the yarn through. You should now have three loops on your hook.
- Yarn over and pull through all three loops.
Practice making several rows of half double crochet stitches to get a feel for the stitch.
Day 4: Double Crochet Stitch
The double crochet stitch (dc) is another fundamental stitch, and it’s taller than both the single and half double crochet stitches. It’s commonly used in many patterns, especially for creating lacy and airy designs.
To make a double crochet stitch:
- Yarn over.
- Insert the hook into the next stitch.
- Yarn over and pull the yarn through. You should now have three loops on your hook.
- Yarn over again and pull through the first two loops.
- Yarn over one more time and pull through the remaining two loops.
The double crochet stitch will give your work a looser, airier feel, making it perfect for blankets and scarves.
Day 5: Learning How to Change Colors
Once you’ve mastered the basic stitches, it’s time to learn how to change colors in your crochet projects. Changing colors adds variety and creativity to your work, and it’s an essential skill for many patterns.
To change colors:
- Finish the last stitch of the current color.
- Before pulling the last loop through, drop the current color and pick up the new color.
- Yarn over with the new color and pull through to complete the stitch.
It’s important to carry the unused yarn along the edge of your project to avoid tangles. Practice changing colors to create stripes or color-blocked designs.
Day 6: Working in the Round
On Day 6, you’ll learn how to crochet in the round. This technique is essential for making items like hats, amigurumi (crocheted toys), and bags.
To start working in the round, you typically begin with a magic ring (also called a magic circle). Here’s how to do it:
- Create a loop with the yarn.
- Insert the hook into the loop and make your first stitch (usually a chain stitch).
- Work the required number of stitches into the loop. For example, if the pattern calls for 6 single crochet stitches, work 6 sc into the ring.
- Pull the tail of the yarn to close the circle.
Working in the round can be tricky at first, but with practice, you’ll soon get the hang of it.
Day 7: Putting It All Together
On the final day, you’ll put everything you’ve learned into practice by completing a small project. This could be anything from a simple dishcloth to a basic scarf or small amigurumi toy. Choose a project that incorporates all the basic stitches: chain, single crochet, half double crochet, and double crochet.
Working on a project will help you solidify your skills and give you a sense of accomplishment. It’s important to take your time and not rush through your work. Remember, crochet is all about practice, and with each project, you’ll get better.

Helpful Tips for Success
- Be patient: Crochet can be tricky at first, but with consistent practice, it will become easier.
- Stay consistent with your tension: Try to keep your stitches even, as uneven tension can affect the appearance and shape of your project.
- Don’t be afraid to rip out mistakes: It’s normal to make mistakes in crochet. Just pull out the stitches and start over!
- Use tutorials: There are many free crochet tutorials online, including videos and written patterns, that can help you learn new techniques.
Conclusion
Learning to crochet may seem daunting at first, but with the right approach and consistent practice, you can master the basics in just a week. By the end of your week-long journey, you’ll have the skills and confidence to tackle more complex projects. Remember to be patient with yourself, and enjoy the process of creating something beautiful with your hands. Whether you want to make gifts for loved ones or simply unwind with a relaxing craft, crochet is a skill that will bring you joy for years to come.


