blog
Creative Crochet Borders for Your Projects
Crochet is a timeless craft that has been cherished for generations. It allows you to create beautiful, functional, and personal items, from scarves and blankets to home decor and accessories. One of the most exciting aspects of crochet is the endless possibilities for creativity. Among these, adding a unique crochet border to your projects can elevate them to the next level. Whether you are a beginner or an experienced crocheter, learning how to create creative crochet borders for your projects will add an extra layer of flair and style.
In this article, we will explore some of the best creative crochet borders you can incorporate into your handmade projects. We’ll cover various techniques, styles, and tips to help you make your projects stand out. By the end of this guide, you’ll be inspired to add your personal touch with the perfect crochet border.
Why Use Crochet Borders?
Crochet borders are more than just decorative details; they serve several important purposes. First, borders can help finish off a project neatly, preventing the edges from curling or fraying. They also provide an opportunity to add contrast or complement the colors and patterns in the main body of your project. Whether you are working on a blanket, a shawl, a pillow cover, or a piece of clothing, a well-crafted crochet border can transform an ordinary project into something extraordinary.

Types of Crochet Borders
- Simple Scalloped Border
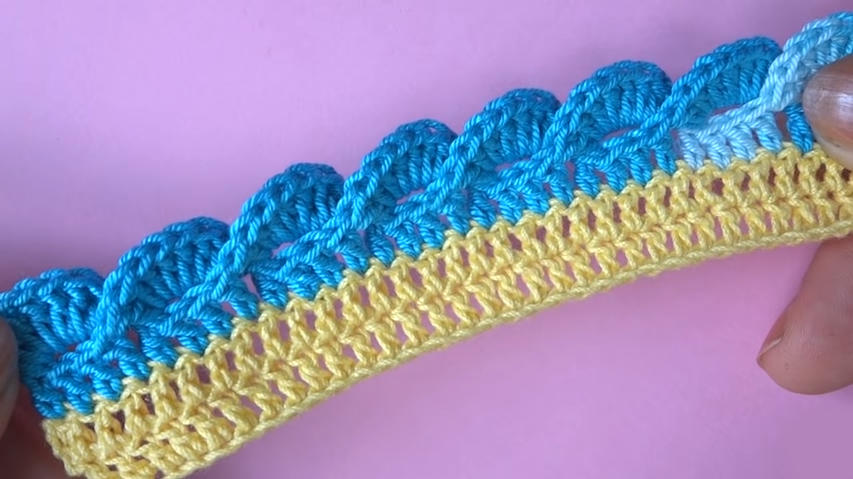
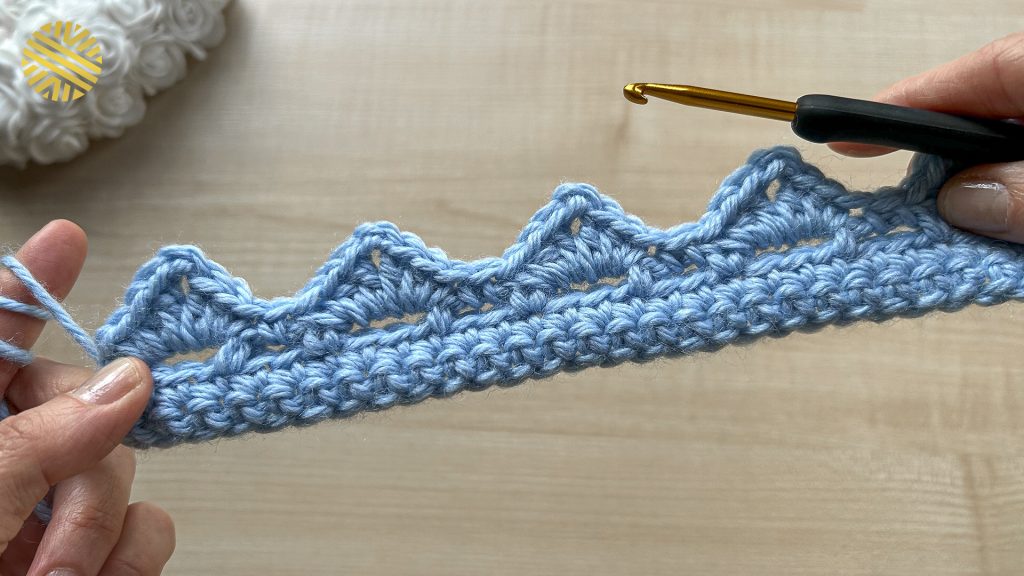
One of the most popular crochet borders is the scalloped border. It’s a simple, yet elegant choice that works well for many types of crochet projects. The scalloped border consists of a series of small loops or “scallops” that add a gentle wave to the edges. To create a basic scalloped border, you’ll typically use a combination of double crochet (DC) stitches and chain stitches.
How to make a scalloped border:
- Start by crocheting around the edge of your project with a foundation round of single crochet (SC) stitches.
- Then, work a series of 5 DC stitches in each chain space or stitch, followed by 1 SC in the next stitch or space.
- Repeat this pattern all around your project for a soft, flowing scalloped effect.
This type of border works beautifully on blankets, shawls, or even dishcloths. It adds a soft, feminine touch to any crochet piece.
- Picot Border
For those looking for a more delicate and intricate crochet border, the picot border is a great option. The picot stitch involves creating a small, raised knot-like loop at the edge of your project. The picot border adds a charming, vintage feel and is perfect for adding a touch of elegance to any crochet piece.
How to make a picot border:
- Crochet a foundation round using SC stitches or another stitch of your choice.
- To create the picot, chain 3 stitches, then slip stitch into the first chain to form a small loop.
- Repeat this process all around the edge of your project, creating picots along the way.
The picot border is commonly used on shawls, baby blankets, or any crochet project where a dainty and decorative border is desired.
- Shell Border
The shell border is another popular choice for adding a little extra flair to your crochet projects. This border features a series of “shells” made by working several double crochet stitches into one stitch or space. The shell border adds a bold, textured look to your project, making it stand out with a little more structure than a scalloped or picot border.
How to make a shell border:
- Start by working a round of SC stitches or any foundation round around the edge of your project.
- To make the shells, crochet 5 DC stitches into the same stitch or space around the edge.
- Skip a few stitches, then repeat the shell stitch in the next space or stitch.
The shell border is perfect for adding texture to blankets, tablecloths, or pillows.
- Ruffled Border
For those looking to add a playful and fun twist to their crochet project, a ruffled border is a fantastic option. The ruffled border gives the edges a frilly, gathered look, making it ideal for projects like baby blankets, skirts, or decorative home items.
How to make a ruffled border:
- Crochet a round of SC stitches around the edge of your project.
- Then, work into each stitch with a combination of double crochet and chain stitches to create the ruffled effect.
- The key to making a ruffled border is to work into each stitch with more stitches than the previous round, creating a “gathering” effect along the edge.
Ruffled borders can add a lot of volume and movement to a piece, making it visually striking and fun.
- Crab Stitch Border
The crab stitch, also known as the reverse single crochet, is a unique and textured border that creates a slightly twisted, braided look. This border works well for a variety of crochet projects, adding a sturdy, polished finish to any item.
How to make a crab stitch border:
- Begin by working a foundation round using single crochet or a similar stitch.
- To create the crab stitch, work backward by inserting your hook into the previous stitch, pulling up a loop, and completing the single crochet as usual.
- Repeat this around the entire edge of your project.
This border is ideal for projects like hats, bags, or any other crochet item where you want a sturdy and decorative edge.
- V-Stitch Border
The V-stitch border is a lovely way to add a bit of lace-like texture to your project. The V-stitch consists of a combination of double crochet stitches and chain stitches, creating a “V” shape at the edges of your project.
How to make a V-stitch border:
- Start by crocheting a round of SC or other stitches around the edge of your project.
- To make the V-stitch, crochet a DC stitch, followed by a chain 1, and another DC stitch into the same stitch or space.
- Repeat this pattern around the edge of your project for a lace-like, airy effect.
The V-stitch border is particularly stunning on shawls, wraps, and summer garments, as it gives the piece a light and breezy finish.

Tips for Perfect Crochet Borders
Creating a beautiful crochet border can sometimes be challenging, especially if you’re new to the technique. Here are a few tips to ensure that your crochet borders turn out perfectly every time:
- Choose the Right Border for Your Project
- Consider the overall style and texture of your project before choosing a border. For example, a delicate picot border may not be the best choice for a heavy winter blanket, while a ruffled border could be perfect for a fun baby blanket.
- Use a Contrasting Color
- A contrasting border color can help highlight the edges of your project and make the border stand out. For example, using a bright color for your border on a neutral-toned project can create a bold, eye-catching effect.
- Ensure Even Tension
- When working your border, try to keep your tension consistent. Uneven tension can cause the border to look sloppy or uneven. Make sure your stitches are the same size all around the project.
- Count Your Stitches
- To avoid creating gaps or tight spots, be sure to count your stitches as you work around the edges of your project. This will help maintain an even look.
- Block Your Project
- Once you’ve finished your crochet project and border, blocking can help set the stitches and give the border a crisp, professional finish. Blocking is particularly important for lace borders like the V-stitch or picot, as it helps open up the stitches.
Conclusion
Crochet borders are a fantastic way to add a personal touch to your handmade items, giving them an extra layer of creativity and style. Whether you choose a scalloped, picot, shell, or any other border, there’s a wide variety of techniques to explore. By adding a beautiful crochet border to your projects, you can elevate your crochet creations to a whole new level.
From adding structure to a delicate edge, borders are more than just finishing touches—they are opportunities to be creative and express your personal style. So, don’t hesitate to experiment with different crochet borders and find the perfect one for your next project. With a little practice and some imagination, you’ll soon be creating beautiful, one-of-a-kind crochet pieces with stunning borders!


